
One thing that unites the world is the mobile phone. When you travel internationally, everywhere you go, people have their phones. Most hotels and many restaurants have Wi-Fi. Still, it’s much easier if you have mobile data when you’re out and about. You can call an Uber, look for restaurants nearby, or find walking directions to attractions or public transit stations.
U.S. Carriers Are Expensive
Mobile data is expensive in the U.S. According to a website, the United States ranked #219 among 237 countries in the world for the cost of mobile data (from the least expensive to the most expensive). Some say it’s primarily due to limited competition, high infrastructure costs, and a poor market structure.
As expensive as it is in the U.S., the U.S. carriers charge multiple times more when you travel outside the country. Some plans charge as much as $10 per day. If you’re out 30 days, that would be $300. And that’s only if you buy the international travel pass before you travel. If you use international roaming without pre-arrangement, your mobile data bill could be enormous. A plan I used to use charges $100 to $150 per GB of mobile data in some countries. If you use 4 GB of mobile data, that would be $400 to $600.
A reasonable cost should be more like $10 — not $10 per day — $10 for the whole trip.
Buy a Local SIM Card
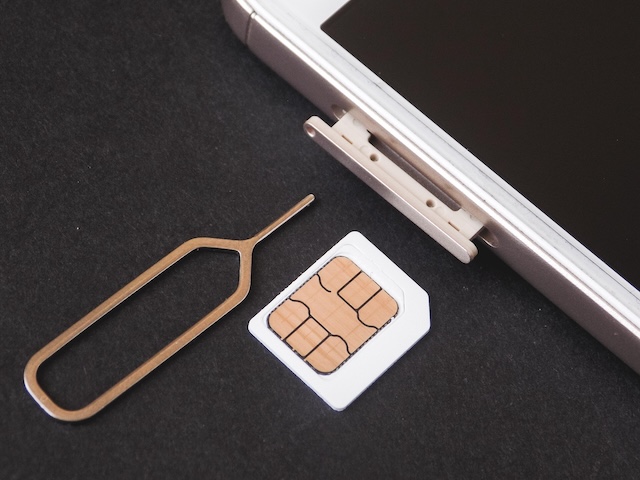
A way to avoid the exorbitant charges from your U.S. carrier is to buy a SIM card locally after you arrive in the foreign country. You find a shop at the airport or on the street to buy a SIM card that covers the length of your stay. You put it into your phone but you have to carefully save your existing SIM card. You’ll need it again when you come back to the U.S.
I did this when I traveled to New Zealand in 2016. I bought a SIM card at a store for $5 that covered a whole month.
This works, but it isn’t always easy to find a store that sells SIM cards to international travelers. You may have a language barrier. You have to take precious time out of your vacation to do it. If you lose the tiny SIM card from the U.S., you’ll have to spend time again to replace it after you return.
eSIM
Technology advances since 2016 gave us eSIMs. An eSIM is an electronic equivalent of the tiny physical SIM card. iPhones sold in the U.S. only use eSIMs after iPhone 14 was released in 2022. Other phones released in recent years that still support physical SIM cards also work with eSIMs.
eSIMs don’t have the limitations of physical card trays and card reading contacts. A phone can simultaneously hold two or more eSIMs or one physical SIM plus another eSIM. You can toggle between two SIMs without worrying about losing one.
It also made it much easier to buy a SIM for international travel. You don’t have to find that local store in a foreign country. You can shop online for a wide selection and the best price before you leave.
Chances are that your current phone already supports eSIMs. If you’re not sure, Google your phone’s model plus the word “eSIM” or ask AI.
I use the website esimdb.com when I buy an eSIM. It’s like a search engine for online eSIM vendors. It gets paid a commission by the vendors. I’m not affiliated with it. I use it only because it includes a wide selection.
You search by which country you’re traveling to, for how many days, and how much data you need. Some eSIMs cover multiple countries. If you’re going to several countries in a region, get an eSIM that covers all your destinations.
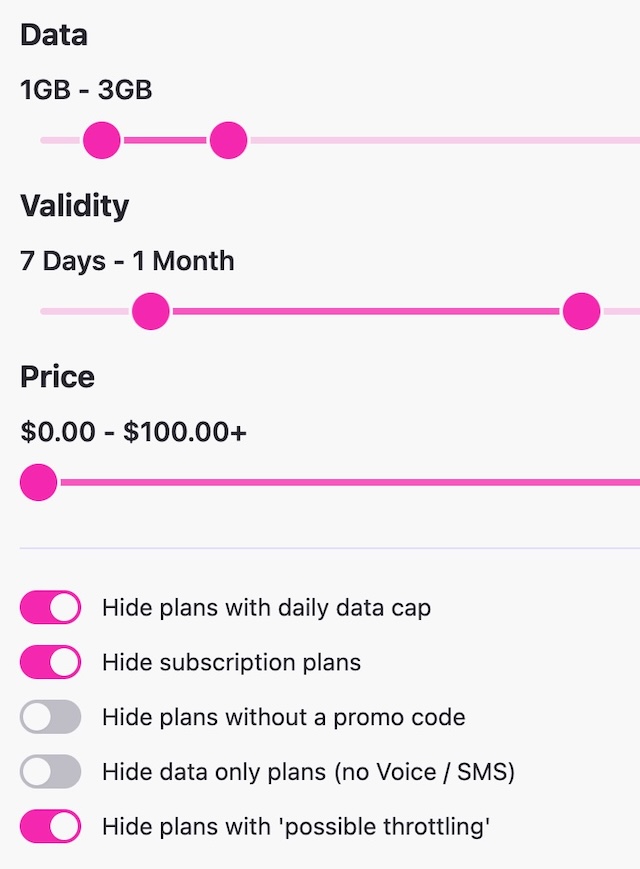
For my typical usage while traveling, 1 GB per week is plenty when hotels have Wi-Fi and I pre-download offline maps. I’m going to Quebec, Canada, for a week. esimdb.com shows multiple vendors that sell a 1 GB eSIM for about $2.
Many eSIMs support top-ups. If you need more data than the amount you originally bought, you can go back to the eSIM vendor and pay more to add more data to your eSIM. eSIMs are quite inexpensive anyway. A 1 GB eSIM for Canada costs about $2. A 2 GB eSIM costs about $4. If I don’t want the hassle of possibly running out, paying $4 versus $2 is a rounding error in travel costs.
I look for eSIM vendors that accept Apple Pay, Google Pay, or PayPal because I don’t want to give them my credit card number directly. If a vendor doesn’t accept Apple Pay, Google Pay, or PayPal, I move on to the next one.
It doesn’t matter if you’ve never heard of the vendors listed on esimdb. I have bought eSIMs from several different vendors for different countries, and the eSIMs all worked as advertised.
You get a QR code by email after you buy the eSIM. You add the eSIM to your phone by scanning the QR code with your phone. Adding a new eSIM doesn’t overwrite your existing SIM. You can switch on and off which SIM should be active. Switch off your U.S. line after you board the plane to avoid international roaming charges.
You can add the eSIM before you leave the U.S., but it will drain your battery a little more when the eSIM keeps looking for its carrier and doesn’t find it. If you decide to add the eSIM when you first land in the foreign country, you must be on Wi-Fi when you add it. You also need to display the QR code on a second device, such as a tablet, to scan it, or you can print the QR code on paper and take it with you.
The inexpensive eSIMs are usually data-only eSIMs. You don’t get a local number for calls and texts, but that’s OK. You can use Wi-Fi calling and messaging apps, such as iMessage or WhatsApp. The eSIM uses a local carrier but it doesn’t necessarily come from a carrier in that country. The eSIM I bought for Spain was assigned a number from Austria. The data roaming setting must be enabled for it to work.
Unlocked Phone
Whether you buy a local physical SIM or eSIM, you need an unlocked phone. A phone locked to a specific carrier doesn’t work with a SIM from a different carrier. If you bought your phone directly from the manufacturer, it’s probably unlocked from day one. Your phone may be locked if you bought it from your carrier at a discounted price or if it’s still on a device payment plan with the phone company.
You can check whether your phone is unlocked if you’re not sure. On an iPhone, it’s under Settings -> General -> About -> Carrier Lock. The menu option for Android phones varies by model. Google the phone’s model and the phrase “carrier unlock status” or ask AI how to find it.
Some phones are still locked after you already satisfied the requirements from your carrier. You can call the carrier and request unlocking. If your current phone is still locked and you can’t unlock it, you may have an older phone that’s unlocked. Put the eSIM on that one and use it for international travel.
Summary
You’ll have mobile data for your phone for usually under $10 for your entire trip if you do these:
1. Check whether your phone supports eSIM. Most recent phones do.
2. Check whether your phone is unlocked. It probably is. Request unlocking from your carrier if it’s locked.
3. Buy an eSIM online for your destination(s) before you leave.
4. Add the eSIM to your phone and switch off your U.S. line at the airport. Remember to enable the data roaming setting for the eSIM.
5. Switch your U.S. line back on after you return and delete the travel eSIM.
Learn the Nuts and Bolts
I put everything I use to manage my money in a book. My Financial Toolbox guides you to a clear course of action.
Craig says
Thanks Harry! This is a great summary of eSIM basics. I’ve been using eSIMs for intl travel a couple years now and it’s always worked well. I usually buy mine from Airalo. So much better than other options to stay connected, with the bonus of no spam calls or SMS texts. For voice calls, you can use wifi calling if needed.
Harry Sit says
Airalo is better known but more expensive. For example, it sells a 30-day 5 GB eSIM for Canada for $18. Other vendors listed on esimdb sell one for $8-10. A $10 difference isn’t a big deal though if you trust Airalo more.
Brian says
Some additional information:
If you have a dual SIM phone you can enable wifi calling on your US SIM/eSIM and then use the data on your local SIM instead of wifi for the wifi calling function. That way you can get calls and SMS from your regular phone number without connecting to a local carrier. If your provider allows roaming with charges you need to make sure your phone doesn’t connect to a local carrier. It can be a little tricky to get the settings right but I’ve done it on both iphone and android phones.
The Wizard says
Another option is to use Google Fi as your cell phone service in the US and then get basically seamless cell service in most foreign countries. Not the cheapest solution in most cases, but likely the most convenient for short stays…
RobI says
Great tip for searching eSIM offers. I’ve started using Jetpac over last 6 months. Its a Singapore carrier with low prices. its really easy to set up the eSim, buy plans and track usage thanks to their mobile app. It also just added outbound voice calling options to their app. It retains the eSim for future trips saving that step next time. So far happy and no service issues.
Aside – AT&T daily rates rip you off, even more then it appears. $12 per day is criminal but they also seem to count number of days based on unclear time zone day changes. They always charge for a day or 2 more of usage when the bill comes in.
theFinanceBuffReader says
On my recent trip to the Netherlands, I bought my first eSIM card. I googled “eSIMs Netherlands,” bought one, and installed it. It worked great… until I visited Brussels, Belgium. In fairness, the eSIM I bought did state it was for coverage in the Netherlands.
This meant I had to buy a second eSIM that would work in Brussels. While searching for eSIMs for Brussels, I noticed something interesting. The same company I used in the Netherlands offered a Europe-wide eSIM for the same price as the Netherlands-only plan I bought.
So, a tip for anyone getting an eSIM for Europe: definitely check if they offer a broader regional plan – it could save you the hassle and cost of buying another one.
Jay says
Three comments:
1. If you are using maps and researching activities like museums and restaurants on the go, 1GB per week is not going to be nearly enough data. Look for an eSim with 5GB per week to travel more comfortably.
2. Turn off the background refresh setting on your phone (or reduce the frequency of refreshes if you have that option), and switch non-essential programs to use wifi only instead of cellular data.
3. Some of the vendors that advertise a lot and make heavy use of influencers are way too expensive. As Harry says, you can find lower-priced alternatives.
Jenny says
Hi Harry,
great eSIM info, I used to use those. I travel so much now that it was worth the headache of switching carriers. T-Mobile has free international. Also, we fly United and it is supported on flights.
DavidBBackpacker says
For those using T-Mobile during International Travel you need to do 3 things: 1. Confirm the country has a participating provider with T-Mobile. Yes, there are over 200 nations with participating cell providers, but it’s good to confirm in advance. 2. Upon arrival at your destination restart your cell phone. 3. Then “turn on” Data Roaming: On a Samsung phone go to Settings-> Connections-> Mobile Networks-> Data Roaming. If the airport wifi is interfering with your connection, turn off your wifi until you’re on your way to your final destination. ¡Buen viaje!
Rita says
OR! If your current phone is compatible with T-Mobile as a carrier, you generally have access in 200 countries as soon as you land. If T-Mobile is too expensive, consider a short-term subscription to one of the MVNOs using their cell towers (Google Fi, US Mobile for example) – some have negotiated access to international coverage provided by T-Mobile.
MVNOs are also another way to get the cell coverage you need at a lower rate than the carriers, with all the same service – except any freebies the carrier offers.
Mighty Investor says
Handy. Thanks!
Chris Lynn says
Good explainer, thanks. I just got caught out by Xfinity: I bought an iPhone 16 Pro Max and took advantage of a trade-in deal that gave me $500 back over 2 years for my old iPhone 11. What was not made clear by the salesperson was that it is carrier-locked, preventing me using an e-sim for my upcoming European travel. I can pay off the balance to get it unlocked, but I’d lose the $500 trade-in value. This severe limitation in use should be made explicit at the point of sale, and I call Xfinity’s failure to do so a deceptive practice.
Peter says
Thanks. My phone is locked to AT&T. But MVNOs that use ATT’s network work, like: Cricket, H2O, Boost mobile, US mobile etc. Any of those provide international service that would be worthwhile to purchase just for a trip (vs ATT rates)?
Harry Sit says
Sorry, I don’t know about locked phones or international service offered by those providers. See if you can get your phone unlocked.
https://www.att.com/deviceunlock/
OrangeIsBad says
I had a bad experience in Switzerland, Germany, and Netherlands with Orange (an esim company). We were there for 3 weeks, so I bought a 30-day, 50 GB esim. It worked only 20% of the time, even in large cities. I didn’t run out of data; I only used about 1GB because most of the time it was non-functional. I emailed for help, but their only advice was to restart my phone. I did that many times, with no improvement. At one point, they just said “Good Luck”. So, I’m glad to learn about esimdb.com.
theFinanceBuffReader says
Did you enable data roaming in the esim settings?
OrangeIsBad says
Thanks “theFinanceBuffReader”. I had an e-sim from Orange purchased shortly before my trip and activated when I got there. I looked back at the instructions I received from Orange. They were quite detailed, and I made sure that I was following them. But there was no instruction about data roaming, so I probably made no change to that. When you have more than one sim, is there a switch for data roaming for each sim (or e-sim)? Orange never suggested that fix when I tried to get help from them.
Harry Sit says
Each eSIM has a separate data roaming setting.
KD says
We are facing the same issue as we will be going on an international trip soon to a single country. We have older smartphones that do not have esim. There is esim.me that will send you a sim card which enables you to have an esim. We just straight up bought sim card for our destination country on Amazon for the best network there. A bit expensive, but trivial compared to cost of the trip. There are lots of esim resellers so be sure to check what network the service runs on and if those bands are useable on your phone. If your phone has esim, Harry’s advice is solid.
Michael says
How do you all handle 2 factor authentication while in a foreign country? The last time we traveled I was shut out of my financial accounts because I couldn’t access my US phone number. Any suggestions would be appreciated. Thanks Harry for another great article! Definitely will be a great reference article for the next time we travel internationally
ntchai says
WiFi calling
Harry Sit says
Use 2-factor authentication not tied to a US phone number: hardware, authentication app, Google Voice, in that order. Text messages aren’t the best authentication method anyway. See Security Hardware for Vanguard, Fidelity, and Schwab Accounts
MHB says
What about e-sim for cruises at sea vs ship expensive wifi? Headed on Alaska cruise. Thanks.
Harry Sit says
An eSIM still uses signals from cell towers. It doesn’t work if the cruise is at sea, out of the range of cell towers on land.
Paul says
My T-Mobile Magenta MAX 55+ plan includes 5GB free high speed international data per month good in 215 countries. Some people get 15GB depending on their plan. That is nowhere near enough for an extended stay but it provides some flexibility on arrival.